Difference between revisions of "Adding Root Password and User"
m (→Setting Root Password) |
|||
| Line 9: | Line 9: | ||
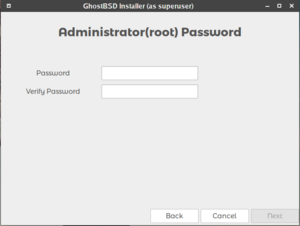
'''Figure 2.8a: Setting root password and adding a user.''' | '''Figure 2.8a: Setting root password and adding a user.''' | ||
| − | [[File:Installer-Set-Root-Password.PNG]] | + | [[File:Installer-Set-Root-Password.PNG|thumb|360|]] |
=== Adding User === | === Adding User === | ||
Revision as of 11:22, 25 July 2018
| Adding Root Password and User |
GhostBSD is designed to let the user have total control of the system, meaning that the user has root access by default and owns the entire system. GhostBSD installer lets the user choose a root password and lets them have complete access to the root account.
Setting Root Password
Password: The system password, also known as the root, superuser, or administrative password, is required for system administration tasks such as installing software, setting up your printer or changing settings that affect all users. You will need to remember this password for the times that you are prompted for it. The password is recommended as at least 8 characters, and you are required to type it in twice to confirm the password.
Figure 2.8a: Setting root password and adding a user.
Adding User
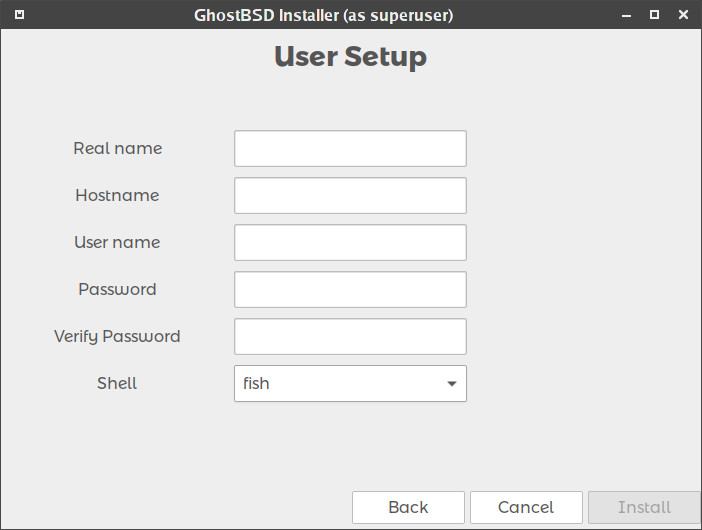
Username: this is the name you will use when logging in. It can not contain spaces and is case sensitive
Full Name: It can be your full name and can contain capital letters and spaces.
Password: this is the password you will use when logging in. You must type it twice in order to confirm it.
Shell: bash (versions up to 3.5) or fish is set by default, you change to the one you prefer in the list.
Setting The System host name
Hostname: input the system's hostname. This name will be the system name of the network.
Figure 2.8b: Adding a user and hostname.

